Origami Medium Crane Step by Step
Melanie has been folding origami since she was a small child. She also runs a YouTube channel: The Curious Coder.

An origami crane can be made in any size!
How to Fold a Paper Crane
Folding a paper crane is easy and only requires a square piece of paper. If you choose a large piece of paper, you will end up with a large paper crane. Likewise, if you choose a small piece of paper, you will end up with a small crane. It's important to note that it's much harder to make creases and folds with a smaller piece of paper, so if this is your first paper crane, you might want to start out with a nice, large square.
You can purchase origami paper at a craft store like Jo-Ann Fabric or Hobby Lobby. If you're just trying out origami for the first time, you might want to practice on a sheet of computer paper that you've cut into a square. That way, you won't accidentally ruin your origami paper (the first crane is always a mess-up).
Note: If your paper has a design on one side, you will want to start out with the colored side up.
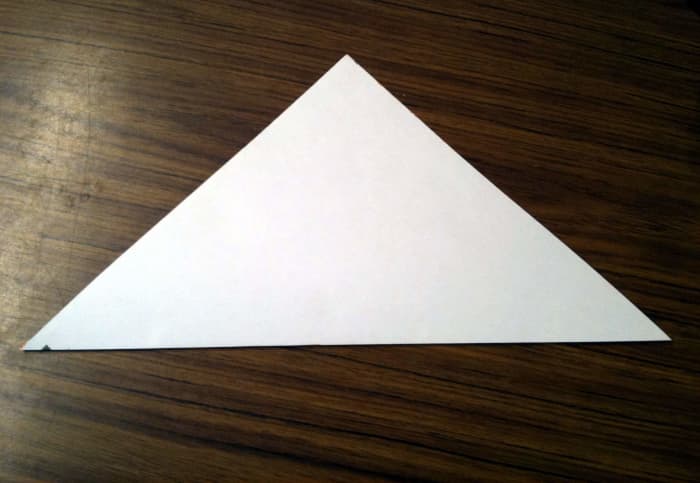
Step 1
Fold the paper in half (diagonally) and unfold so that the colored side is facing up again. Then, fold the paper in half (diagonally) in the other direction.
Step 2
Unfold your paper so that the colored side is facing down.
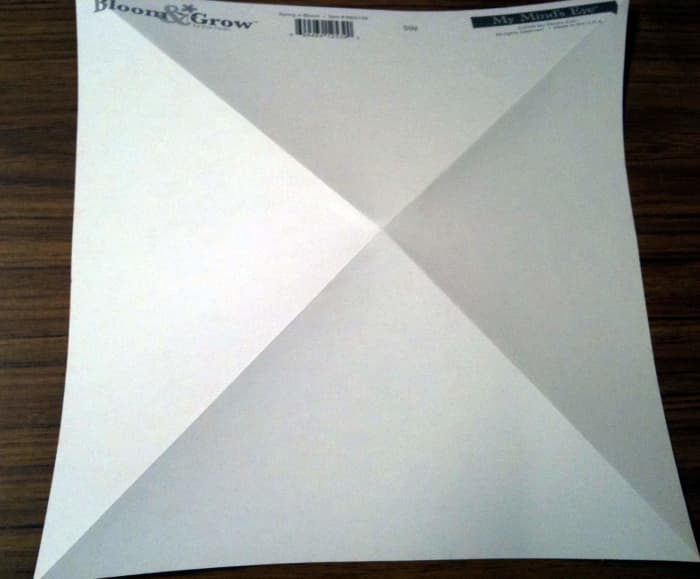
Step 3
Fold the paper in half. Unfold so that the colored side is facing down again. Then, fold your paper in half in the other direction. Unfold. Your work so far will look like the image below.
Step 4
The creases you've made previously are what make this step possible. Bring the top, right, and left corners down to the bottom corner and flatten. Your paper crane should look similar to the image below.
Step 5
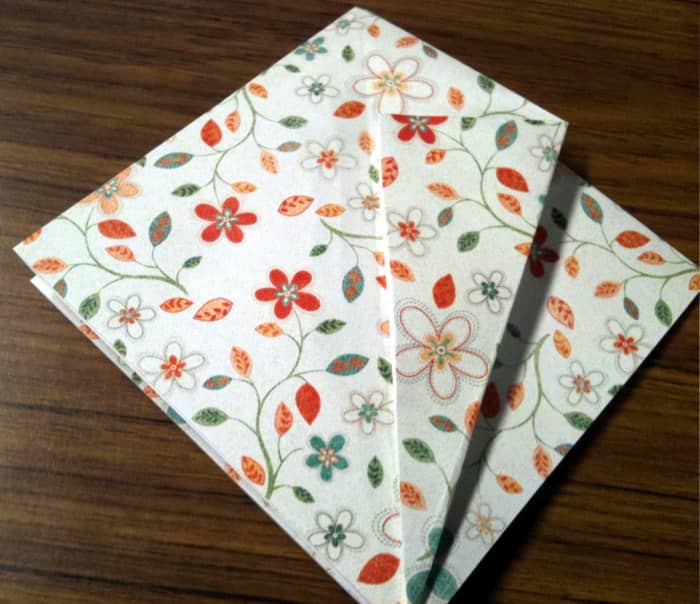
Fold upper layer of right corner inward to the center so that it looks like the image below. Repeat this step with the left corner.
Step 6
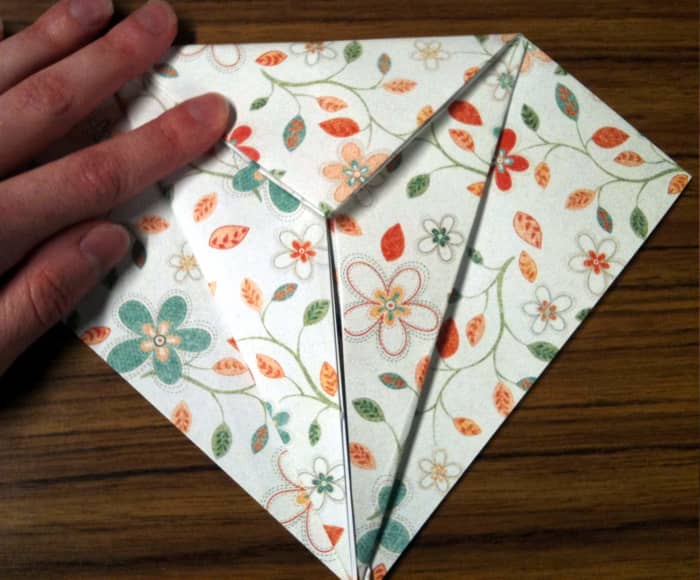
Fold top corner down until it meets the upper section of the fold made in step 5. After this step, your paper crane should look kind of like a diamond as pictured in the image below. Unfold only what you folded in this step.
Melanie Shebel
Step 7
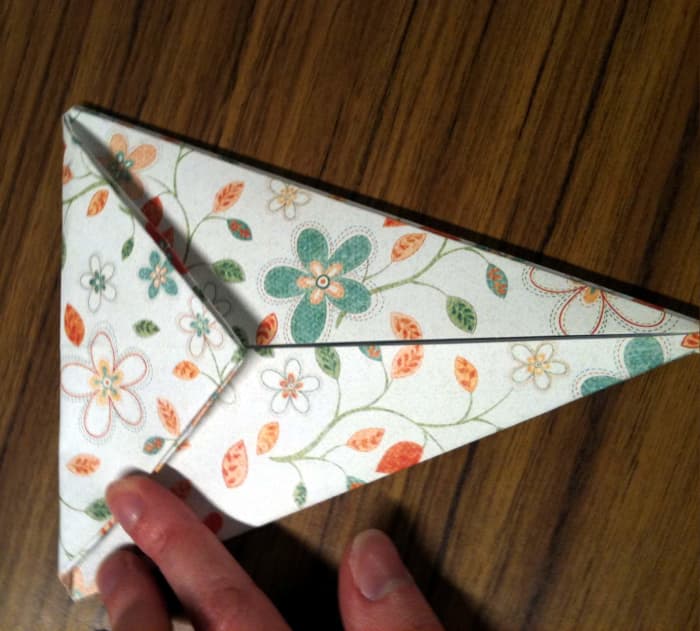
Turn over your paper crane to-be. Repeat steps 5 and 6 on this side so that your crane looks like the image below.
After all this folding, it looks like your paper crane is really starting to take shape! It doesn't look quite like a crane yet. Sadly, in this step you are going to unfold your paper so that it looks similar to what it did at the end of step four.
Step 8
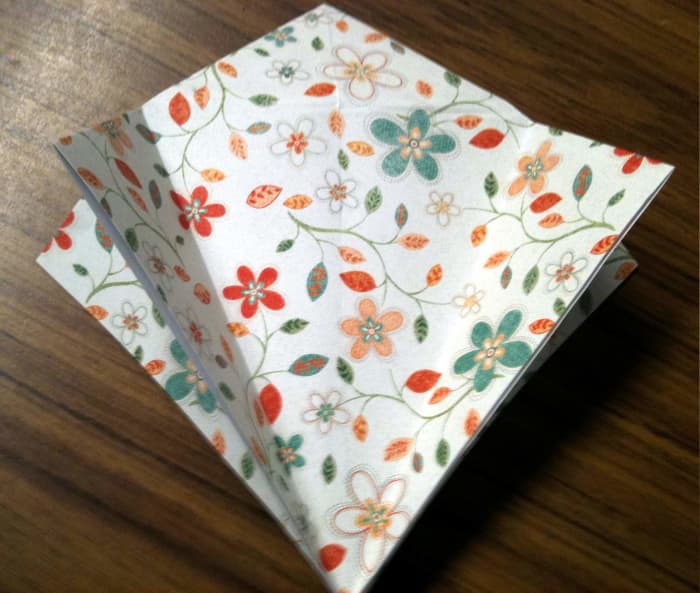
Unfold your paper so that it looks similar as to what it did at the end of step 4 (except this time it will obviously have some new creases).
Step 9
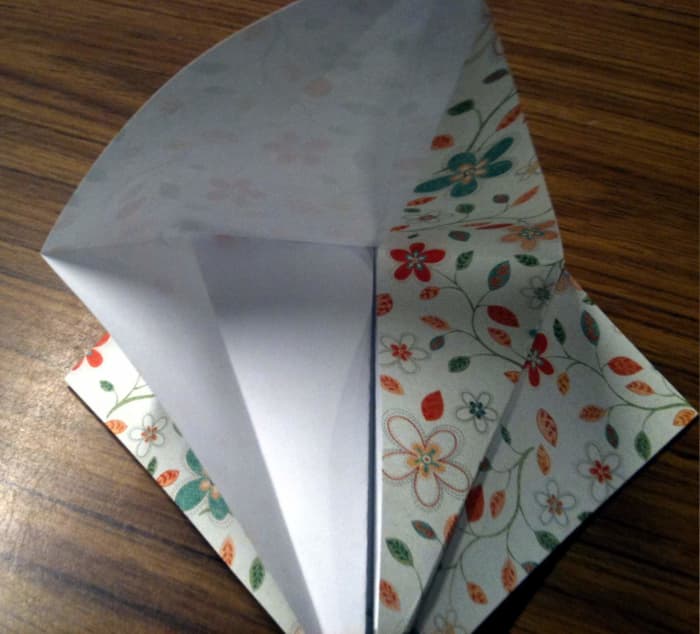
Note: Step 9 is one of the most complicated steps in making a paper crane, so I've put together three images (below) to really show everything that happens in this step.
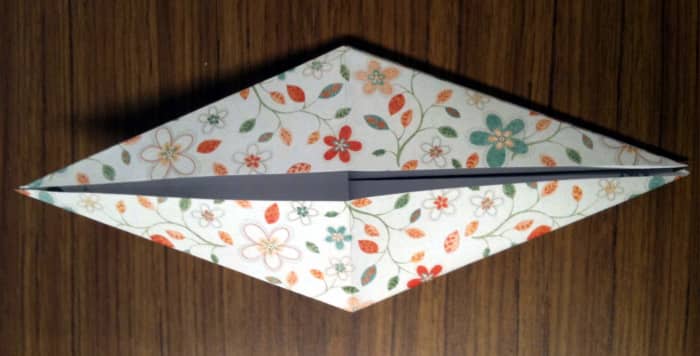
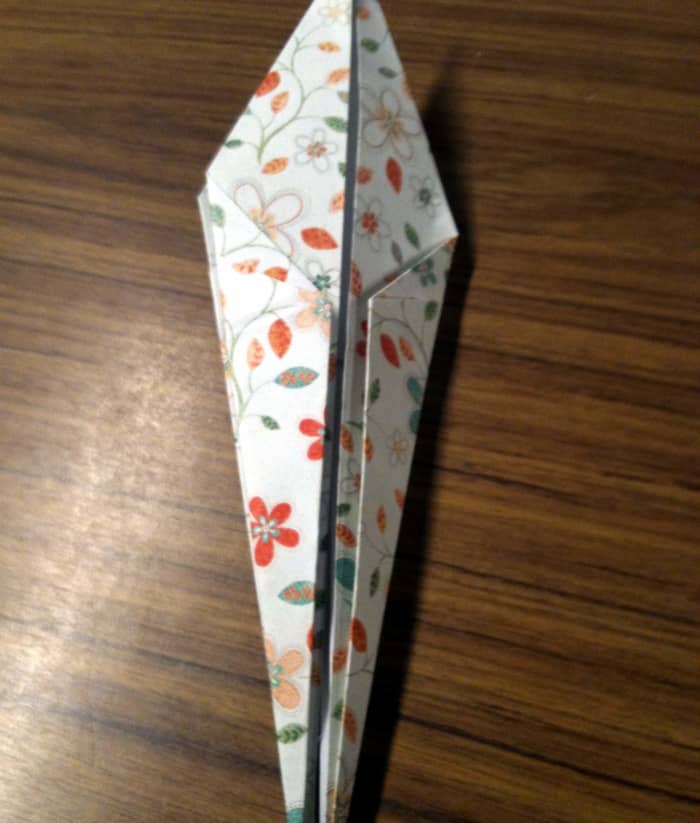
The first image (9.1) below shows the top flap being opened. The second image (9.2) shows one of the sides folded inward. In this step, however, you will need to fold both sides inward. The last image (9.3) shows what your paper should look like at the end of this step. It should be diamond shape and look as if one end has legs.
Here is the step-by-step process for this:
Read More From Feltmagnet
- Open the upper flap of the paper. While opening the upper flap, carefully fold both sides inward. The creases made in previous steps will guide you along as you fold.
- As the paper gets closer to the center, you will feel it "snap" in as if the paper knows it belongs there.
- Turn over the paper and repeat open the upper flap of the paper. Carefully fold both sides inward, just like before.

Step 9, Part One
Step 9, Part Two
Step 9, Part Three
Melanie Shebel
Step 10
Note: Like step 9, step 10 can be complicated as well, so there are two pictures for this one so that you can more clearly see what I'm talking about.
It's easiest to do this step if you turn your paper so that the "leggy" part of the crane is the point closest to you.
Here is the step-by-step process for this:
- Taper the top layer of the right "leg" part (see image 10.1 to see what I mean when I say "taper").
- Repeat on the left leg.
- Turn over your crane and taper both legs on this side.
After the end of this step, you should notice that your crane is starting to take shape and it should look like the image below labeled 10.2.
If you're frustrated after steps nine and ten, just know step ten is like the light at the end of the tunnel!
Don't worry, we're not going to unfold it all again! We're finishing up the paper crane very soon!

Here I am tapering the right leg.
This is how it should look at the end of step 10.
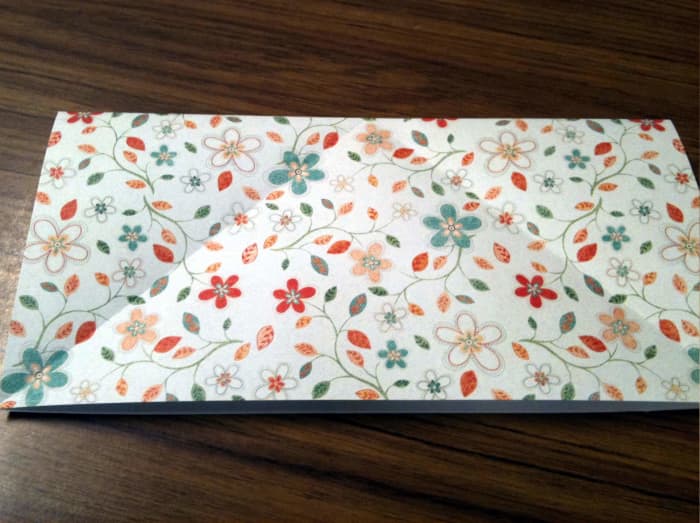
Step 11
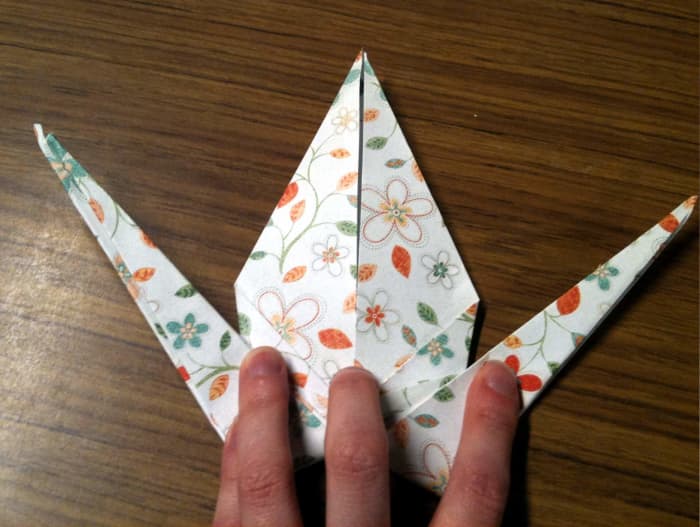
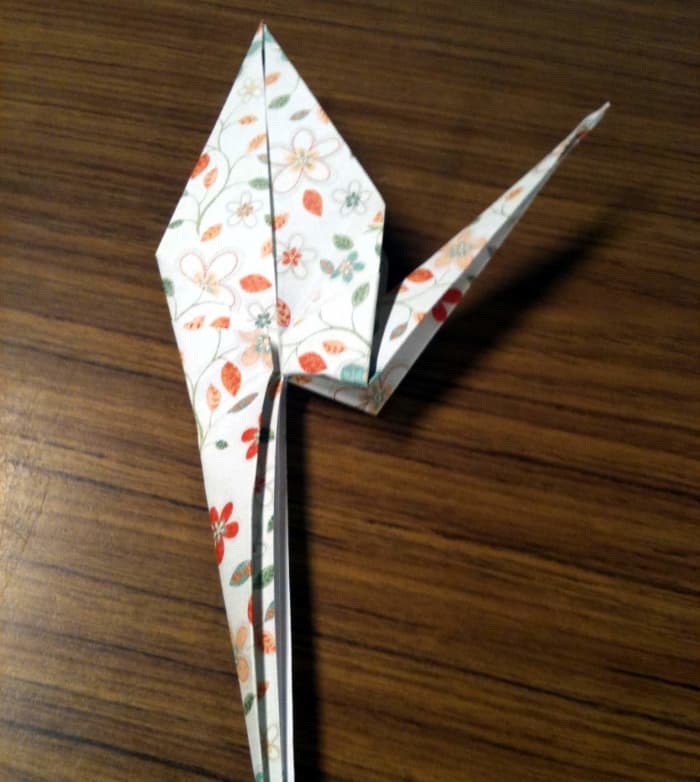
Fold each leg up at an angle (as pictured below). Crease the fold really well (if will make the next step much easier). Unfold only what you did in this step.
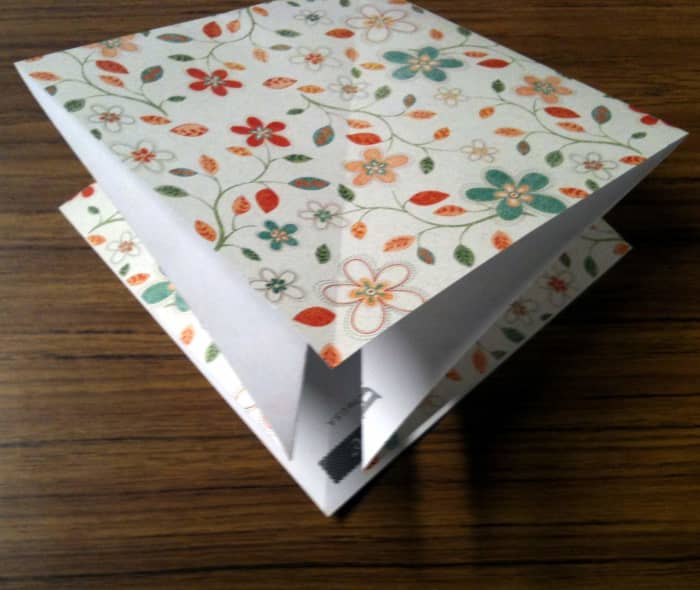
Step 12
Tuck the right leg up and inwards (as shown in the image below). Repeat with the left leg.
Step 13
Choose whichever end you wish to be the head and fold it down (as pictured below). I tend to choose the "less perfect" end to be the head as I find that this last fold tends to hide any tiny imperfections there may be at the tips.
Fold the wings downward and crease.
Under your crane, you will notice a little hole. You can use the hole to gently blow air and "inflate" your paper crane.
You now have finished making your paper crane. Congratulations!
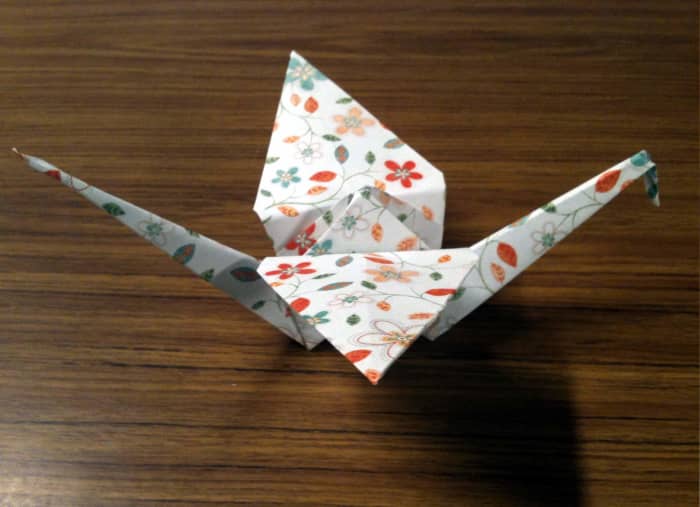
Your finished paper crane
Melanie Shebel
Paper Cranes as a Classroom Activity
Making a paper crane is a fun activity for both kids and grown-ups alike. Paper cranes can make for a great classroom activity that is not only useful in teaching children how to follow instructions, but to also teach about world peace using the story of one thousand paper cranes.
The book Sadako and the Thousand Paper Cranes is a nonfiction children's book by Eleanor Coerr that can be read to children before or after they learn to make a paper crane. The book and the paper crane activity make up a great lesson plan for children learning about peace.
The Story of the Paper Crane
Origami, the art of folding paper, has its roots in Japan. One of the most popular pieces of origami to make is the paper crane. Not only is a paper crane a beautiful example of origami, but according to Japanese legend, anyone who folds one thousand cranes will receive a wish from a crane.
Because of this, paper cranes make great gifts in Japan. After the Tōhoku earthquake in March 2011, people from all over the world sent handmade paper cranes to Japan as a symbol of well-wishing and support of the Japanese people.
In 1945, Sadako Sasaki was two years old when the atomic bomb hit her hometown of Hiroshima. Years later, Sadako was diagnosed with leukemia. While in the hospital, a friend shared the legend of the thousand paper cranes. Sadako then set out to create a thousand paper cranes in order to earn her wish: to live. Sadly, Sadako died at the age of 12 in October of 1955.
After Sadako's death, a memorial statue was created in remembrance of all the children who died from the effects of the atomic bomb. The statue plaque reads " This is our cry. This is our prayer. Peace on Earth. "
© 2011 Melanie Palen
ashley on April 26, 2019:
this is hard
predaraptor on January 21, 2014:
I love this website I make and sell origami at my school this is so informative and a lot better than those crappy origami books
Laurel Rogers from Bishop, Ca on July 31, 2012:
Gawd, Melanie-
How I wish we could bookmark hubs-as we used to. I'm gonna put this in my computer for future reference...wonderful instructions and well-sized photos.
Wonderful job!
Laurel
Kelly Umphenour from St. Louis, MO on July 31, 2012:
That is cute Mel! I will let my girls try to make one. I make awful paper airplanes - maybe this can make up for some of that! lol
Kymberly Fergusson from Germany on February 24, 2012:
Clear steps, beautiful paper and a really neat crane! I loved seeing so many colourful chains of paper cranes while I was in Japan.
dinkan53 from India on January 28, 2012:
Great work. Simple steps that even a child can understand. Effective way of explaining with pictures. Like your hu and voted up, interesting!
Shasta Matova from USA on January 28, 2012:
Beautiful photos, and great step by step directions. I really like the paper you used too.
Aurelio Locsin from Orange County, CA on January 28, 2012:
That is the smallest crane I've seen (in the first picture). Nice work on the procedures -- I especially like all the pics. Voting this Up and Useful.
Me on October 27, 2011:
how do the women at the chinese restraunt do this so fast
Ratanak on August 24, 2011:
While I am now in Japan, I love so much to fold the paper crane as a wish for Japanese people who died during the earthquake and tsunami in 2011. Thank your great tutorial !
ournote2self on August 08, 2011:
Very cute. Thanks for sharing. :)
AAREN1975c from CA on August 05, 2011:
I love to make paper crane. You have give very nice explanation.
Rose Clearfield from Milwaukee, Wisconsin on August 05, 2011:
Great tutorial! I love the step by step photos.
TroyM on August 02, 2011:
I like you article on paper model. Great tips! Thanks!
Hello, hello, from London, UK on June 08, 2011:
I love Origami and this hub is fantastic. Thank you for sharing.
Origami Medium Crane Step by Step
Source: https://feltmagnet.com/crafts/How-to-Make-a-Paper-Crane
0 Response to "Origami Medium Crane Step by Step"
Post a Comment